Hello everyone,
This is the third issue of Ghost Tips & Tricks. I will be happy to share with you some practical Ghost tips that I find useful. Brought to you by Aspire Ghost Themes .
Recently, I tried the Deploy Ghost Theme Github action. Wow, this is a great tool for theme deployment and a time saver. This tool helps with theme deployment. This means that instead of uploading your theme to your Ghost blog every time you make a change. You can now deploy your theme every time you push a new update to your theme repository master branch.
I assume you are familiar with using Git and GitHub and your theme is already on GitHub.
1. Create a Custom Ghost Integration
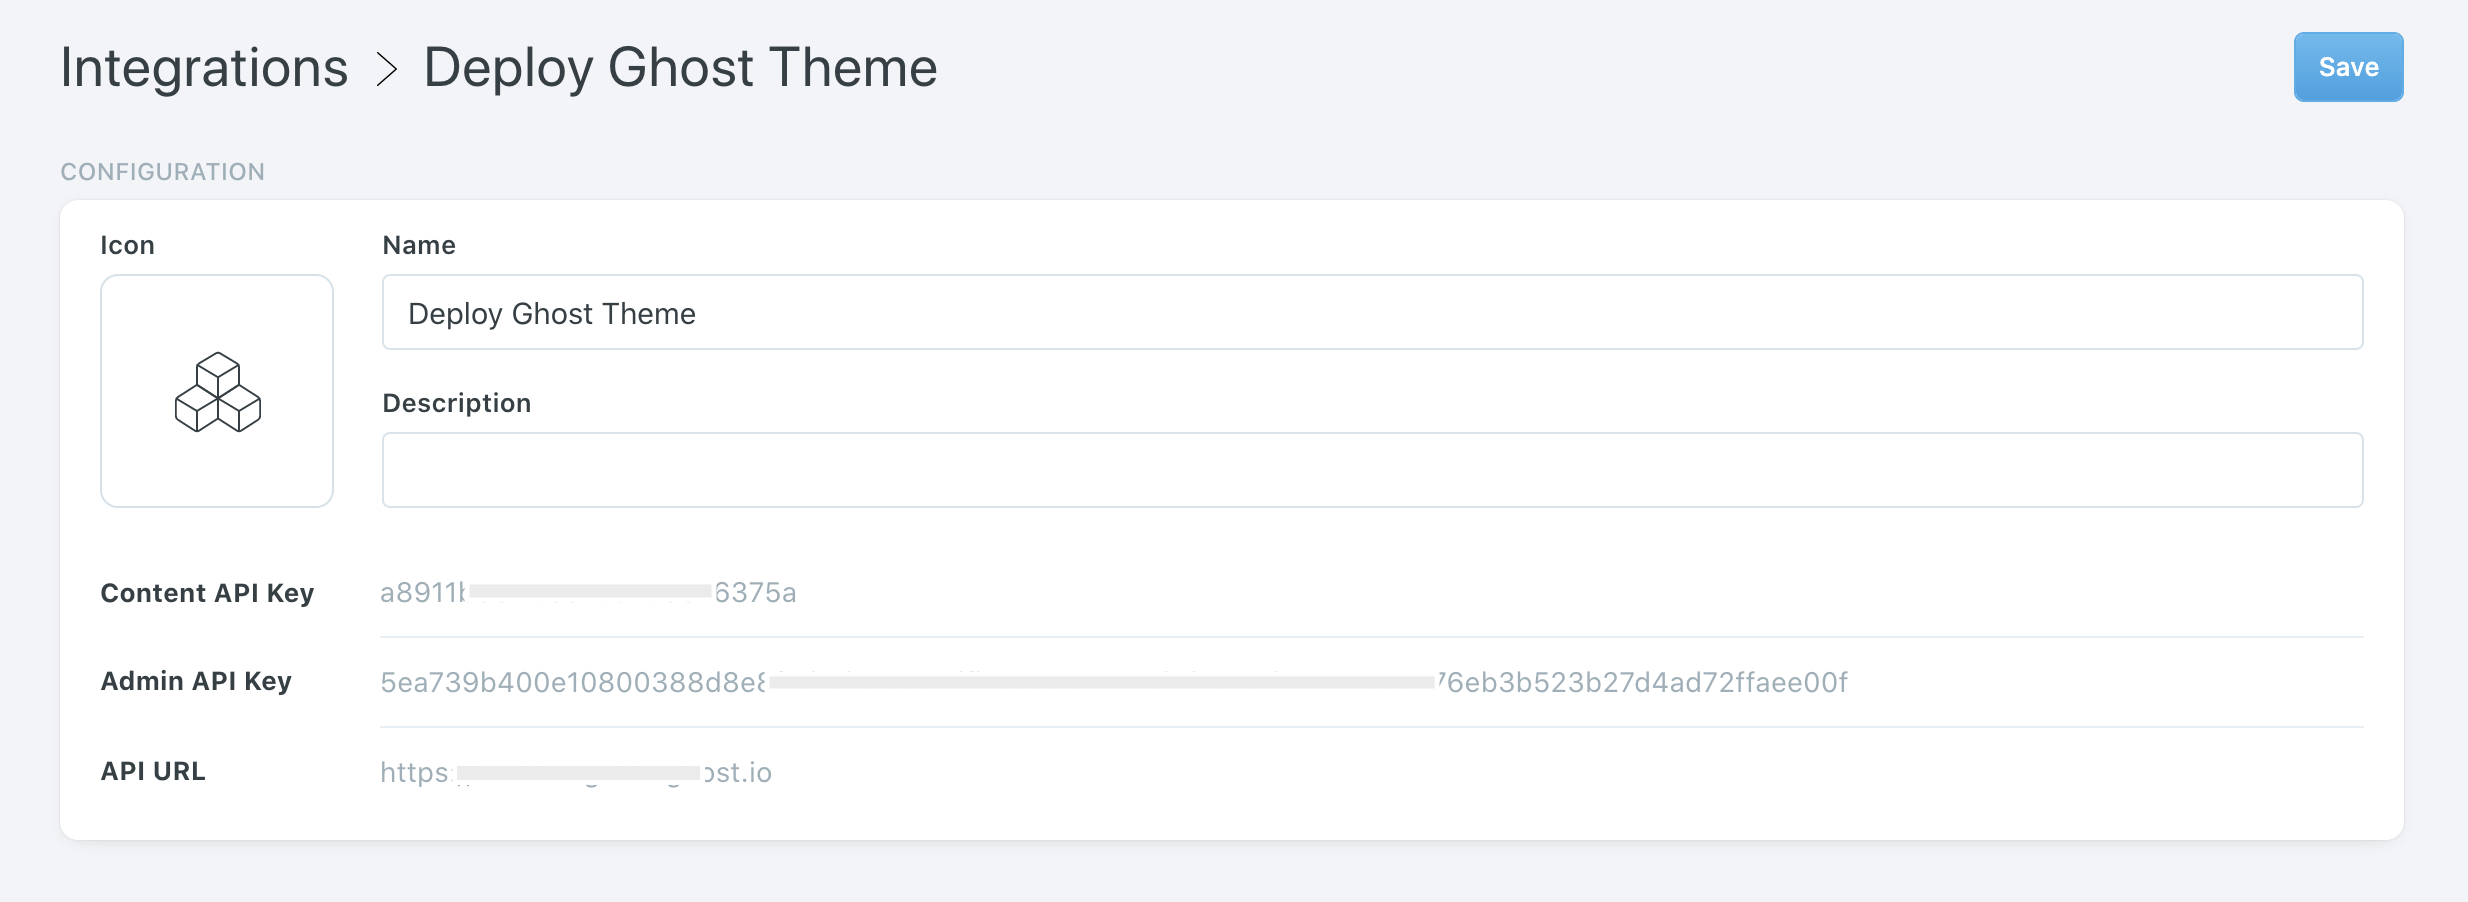
The first step we need is to create a new Custom Integration in Ghost Admin » Integrations.
You can give the new integration a new name. For example, Deploy Ghost Theme.
Once created the integration, two values will be available, Admin API Key, and API URL.
2. Create GitHub Repository Secrets
On the GitHub theme repository, navigate to Settings > Secrets.
Create two new secrets. The first one called GHOST_ADMIN_API_KEY containing the Admin API Key. The second one called GHOST_ADMIN_API_URL containing the API URL.

3. Add the Github Deployment Config File
Inside your local theme repository, create a config file called .github/workflows/deploy-theme.yml and copy the following code into it. Once you added this file, commit and push your changes to the remote repository.
name: Deploy Theme
on:
  push:
    branches:
      - master
jobs:
  deploy:
    runs-on: ubuntu-18.04
    steps:
      - uses: actions/checkout@master
      - uses: TryGhost/action-deploy-theme@v1.2.1
        with:
          api-url: ${{ secrets.GHOST_ADMIN_API_URL }}
          api-key: ${{ secrets.GHOST_ADMIN_API_KEY }}
You are now ready to test and do your first theme deployment. Every time you push a new commit to the repository master branch, the theme will be deployed automatically.
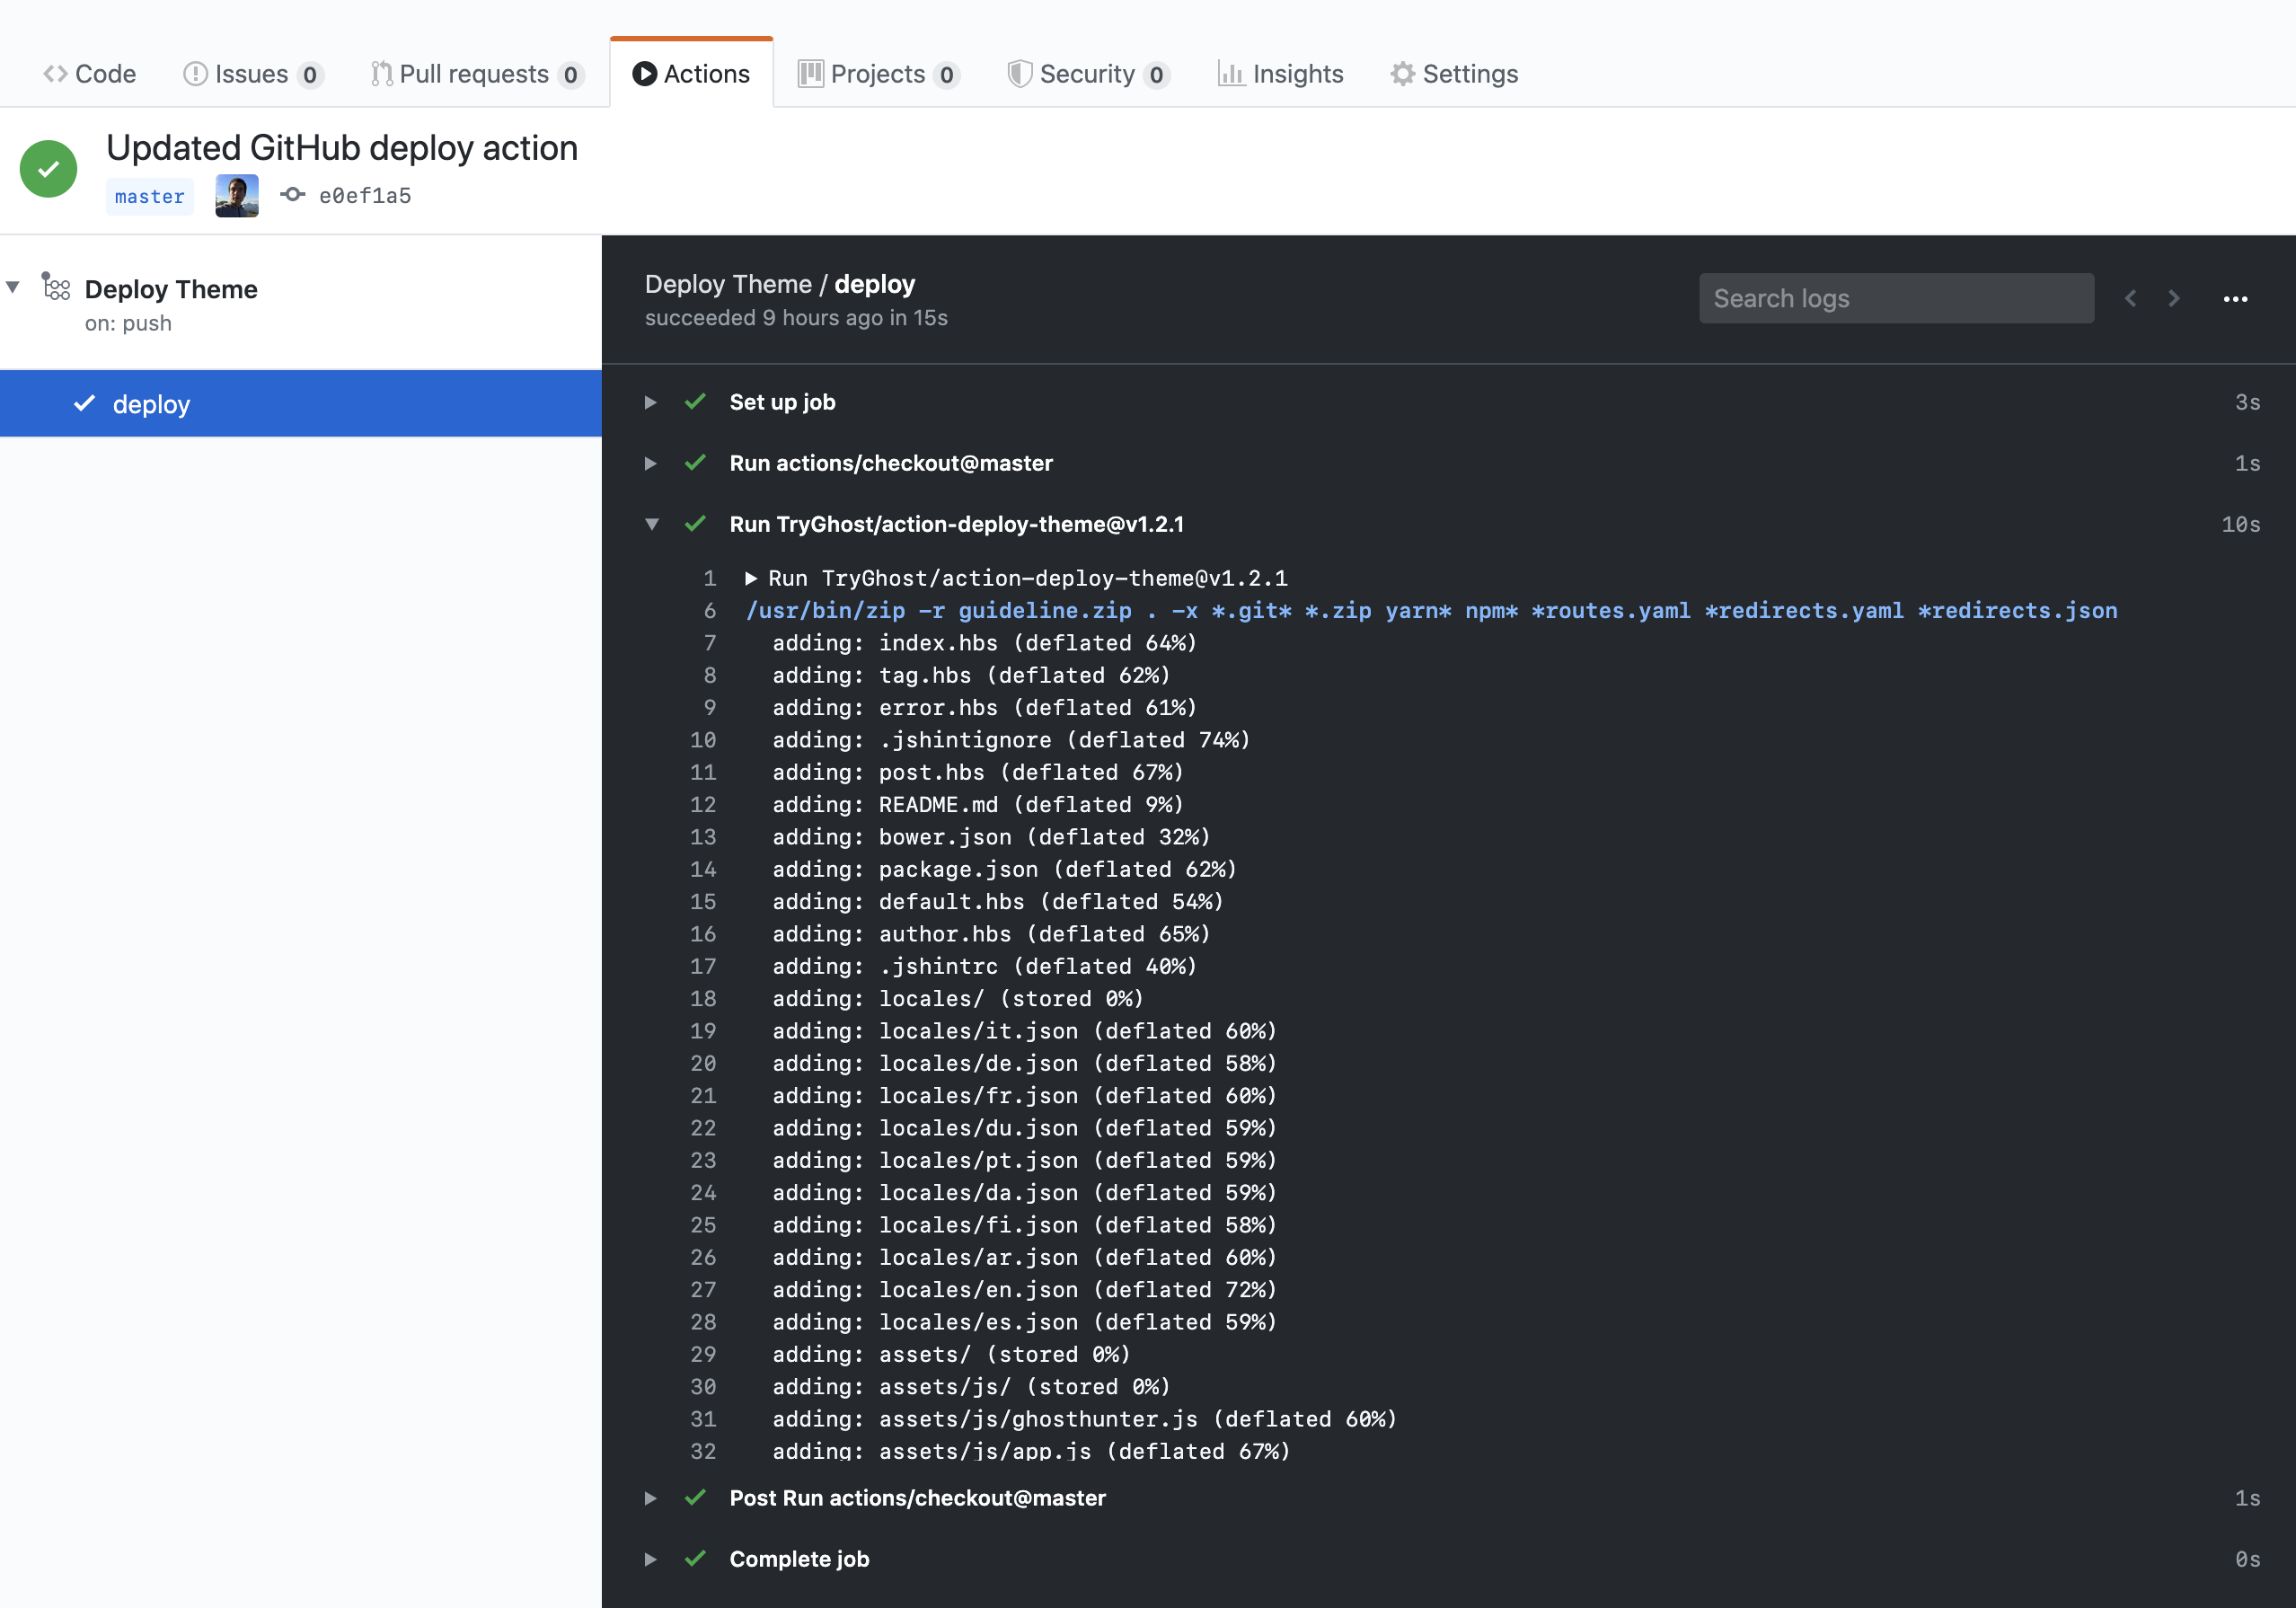
On the GitHub theme repository, navigate to Settings > Actions to check the theme deployment actions list.

You can click any action and see more details about it.
That’s it for today and I hope you find this useful…
Checkout previous parts of the Ghost Tips & Tricks series:
- Ghost Tips & Tricks #1 / Show Publish Date in the day time with AM and PM format.
- Ghost Tips & Tricks #2 / Ghost Admin Right to Left (RTL) Support.
Also, I started a Ghost Websites Inspiration series share inspiring websites created with Ghost. I hope you can find it inspiring and useful too.
Stay safe!
Ahmad